x
FAQ
Show all
Hide all
- NS Server installation
-
- Installing third-party NS-servers
-
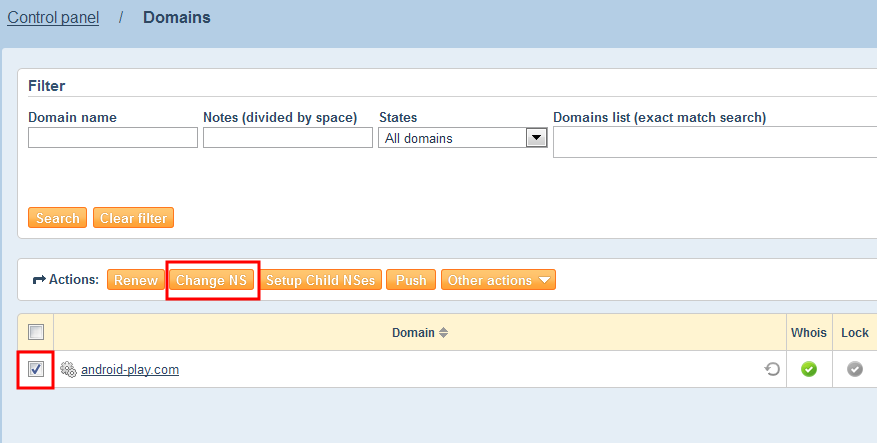
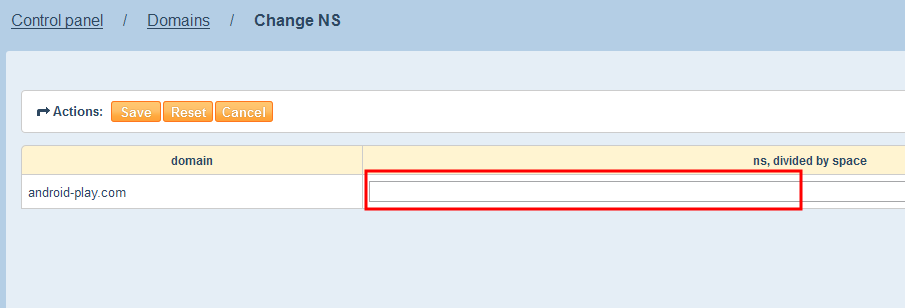
If you have an NS server that is issued by the hosting provider, a subsidiary or any other type of NS server, you should go to "Domains - My Domains" section and click on "Change NS" button by highlighting the domain check box.
Allow some time for the saved changes to take effect. Information update on main DNS roots may take up to 48 hours.
- ahnames.com NS-server installation
-
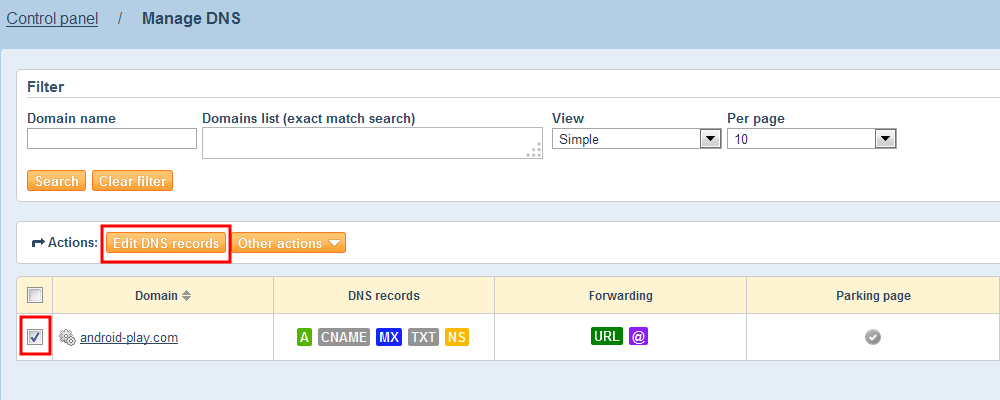
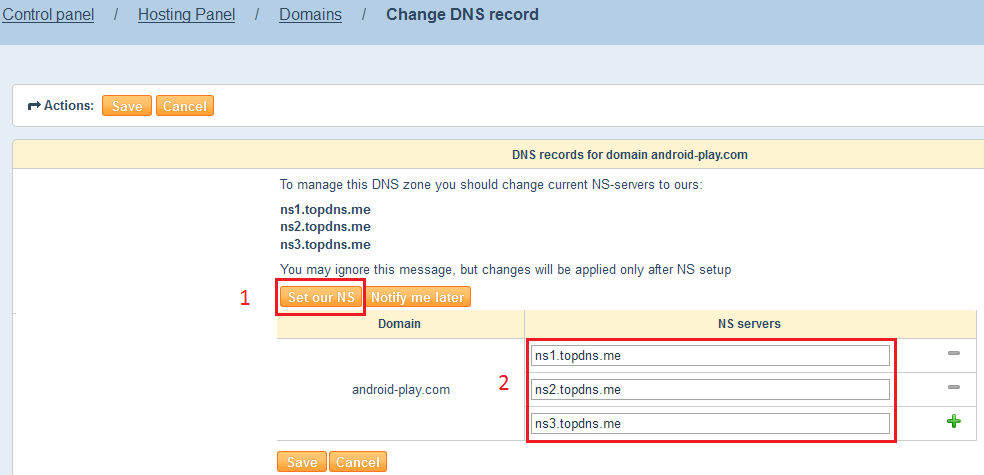
To configure a DNS in the ahnames.com panel, go to "DNS control" section and click on the "change DNS" button by highlighting the domain check box. The system will offer to install our NS-servers. You'll need to paste NS-server info into specific lines after clicking on "install our NS" button.
Allow some time for the saved changes to take effect. Information update on all servers may take up to 2 hours.
- Creating subsidiary NS-servers
-
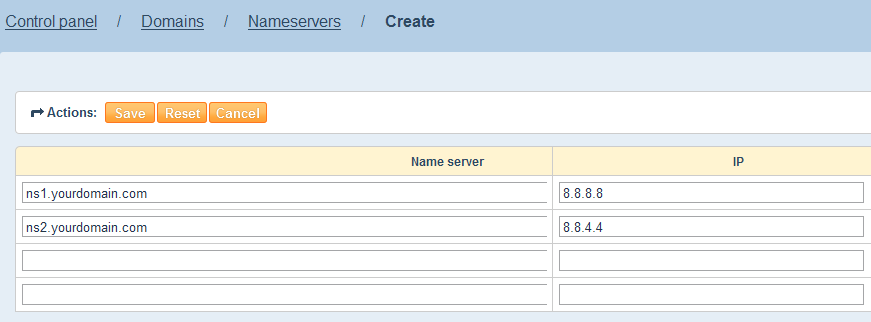
To create a subsidiary NS-server go to "Domains — server names" section and click on "Create nameserver" button.
In the window that appears specify the name and IP address. You can write subsidiary servers for any domain when the changes are saved.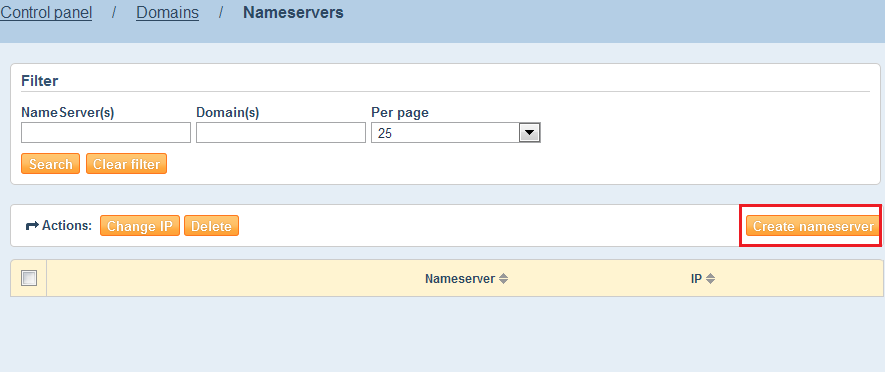
- Setting a DNS in ahnames.com panel
-
- A-record
-
You need to install our NS-servers to configure the A-record in the ahnames.com panel.
Installing ahnames.com NS-servers.
After selecting the A-record type, specify the correct IP address in the line that is shown on the screenshot.
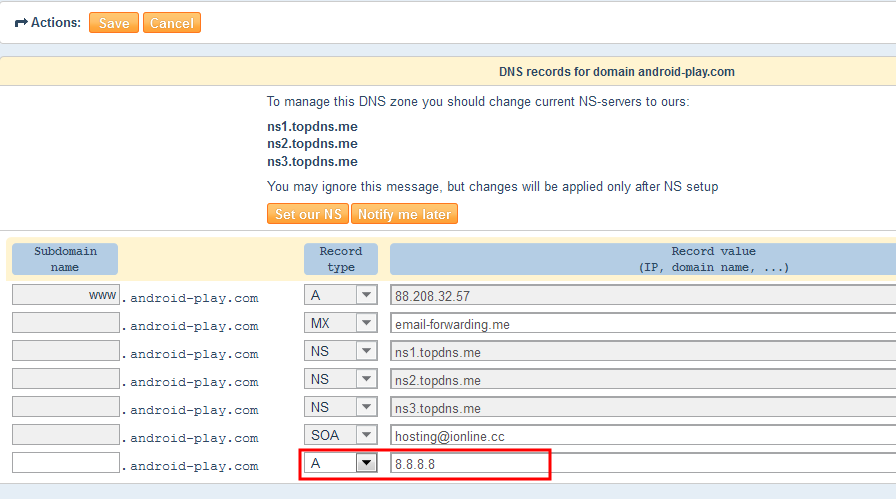
You can also specify IP addresses for Subdomain names if necessary. To do that, the Subdomain name should be indicated as prefix in the specific field. If you need to specify only one IP address for all Subdomain names, write "*" symbol in the "Subdomain name" field.
- MX-record
-
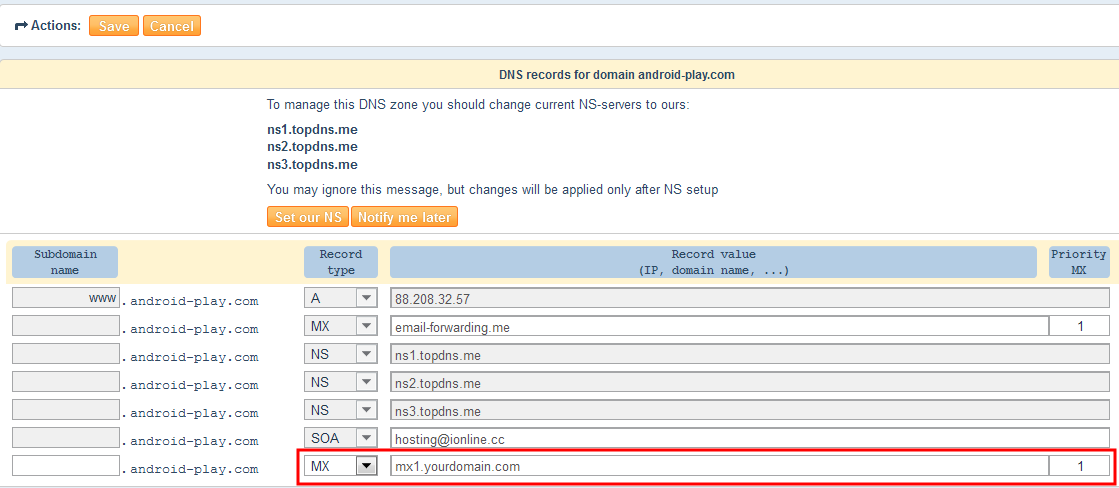
You need to install our NS-servers to configure the MX-record in ahnames.com panel.
Installing ahnames.com NS-servers.
After the A-type record is selected, specify the subdomain name, that the record will use and specify the correct IP-address. Next, when selecting the "MX" type record, specify MX priority for the created domain. As a rule, the following priority values are specified for postal server: 10, 20, 30, 40, 50. The closer the value is to 0, the higher its priority is. Mail is processed by a server that has higher priority value. If this server is unavailable, mail will be processed by a server with lower priority.
- CNAME-record
-
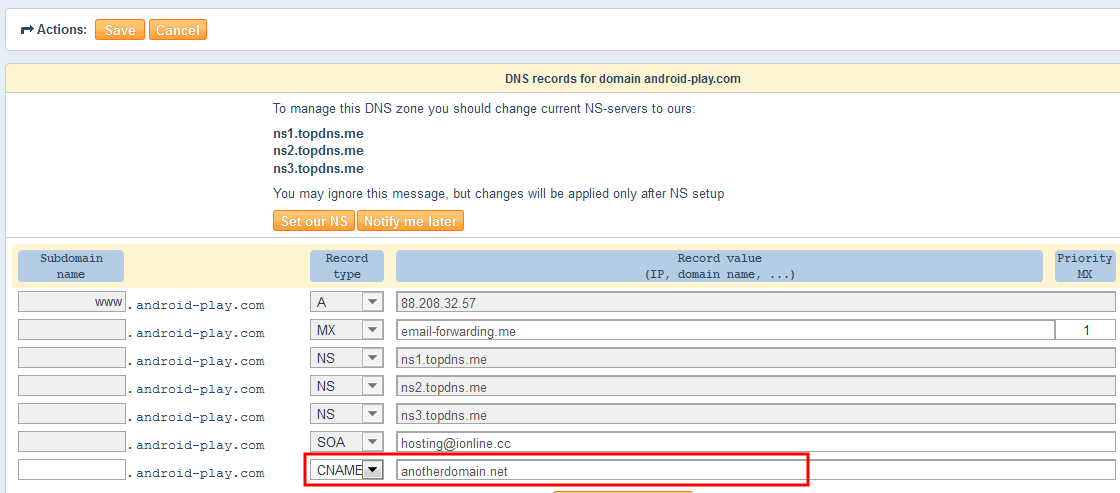
You need to install our servers to configure the CNAME-record in the ahnames.com panel.
Installing ahnames.com NS servers.
When CNAME-record is selected, specify the domain that will be used to refer to main domain name or the specified Subdomain name.
- Premium package
-
- SOA-record
-
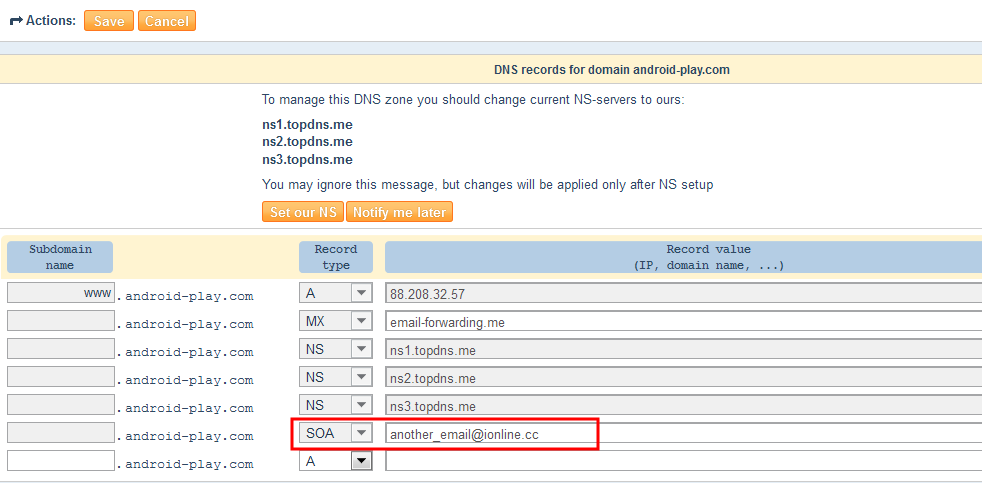
You need to install our NS-servers to configure a SOA-record in ahnames.com panel.
Installing ahnames.com NS-servers.
If you have selected the "Premium package" you will be able to edit "Email address" and "TTL" fields.
- URL forwarding
-
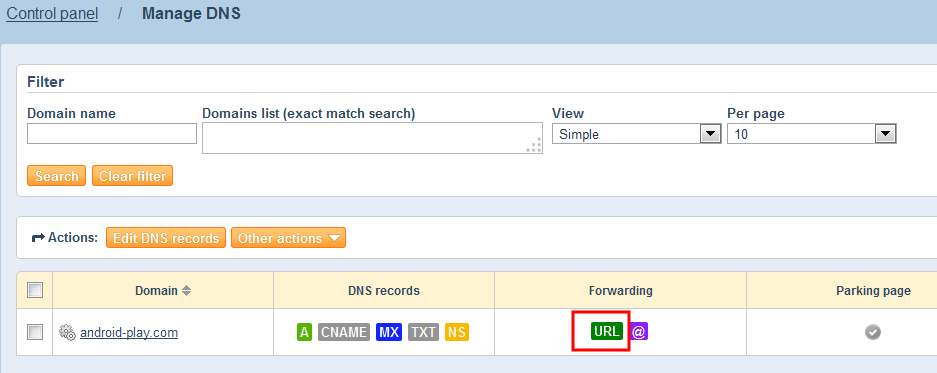
You need to install our NS-servers to configure URL forwarding in ahnames.com panel.
Installing ahnames.com servers.
Activate "URL forwarding" option for specific domain In the "Manage DNS" section. Select one or several domains and choose the necessary option in the dropdown window.
Now you can configure forwarding from your domain to any other website. You can also configure forwarding for Subdomain names or use "*" symbol to indicate any Subdomain name."Forwarding address" allows entering get urls that look like this: http://name/.
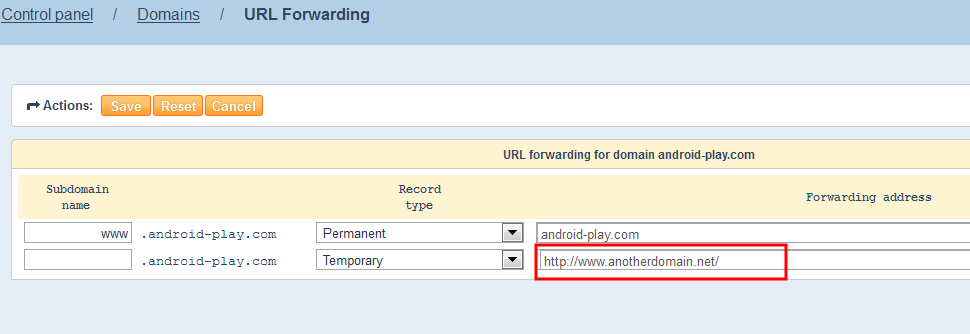
The following settings can also be used to forward an URL: 301 — transferred permanently, 302 — transferred temporarily.
- E-mail forwarding
-
You need to install our servers to configure E-mail forwarding in ahnames.com panel.
Installing ahnames.com NS servers
Activate the "Mail forwarding" option for necessary domain in the "Manage DNS" section.
Now you can configure mail forwarding from your domain to any existing email address. It is possible to forward mail from a specific user as well as all mail. Use "*" symbol as user’s name to forward all mail.


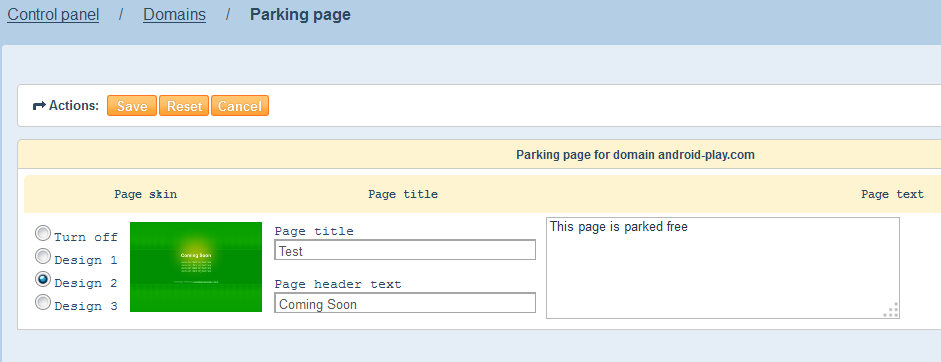
- Parking page
-
Activate the "Parking page" option for selected domain in the "Manage DNS" section.

Installing ahnames.com NS-servers.
Now you can create a parking page. Three design options are available, as well as the possibility to edit the header, title and text from the page (up to four lines).
- Errors and Problems
-
- The "Object does not exist" error during NS-server installation
-
This error means that you want to write values for subsidiary servers that are not yet created.
To create subsidiary servers, please read the "Creating a subsidiary NS-server" guide.
- I have specified NS-servers but my website doesn’t work
-
Please check if domain name is pinging. To do so, write: ping yourdomain.com in the command line. If your server sends answers with correct IP-address, the problem is with your hosting provider.
DNS Server setup
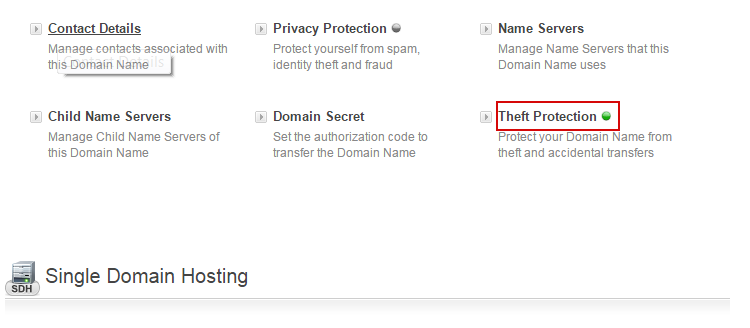
- Transferring domain to other user
-
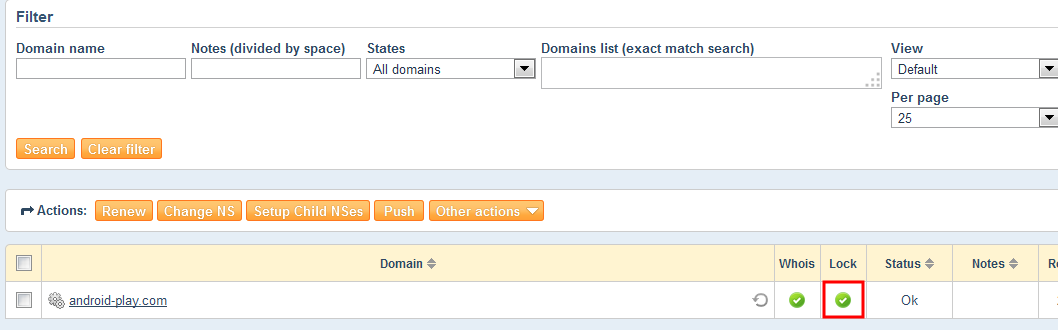
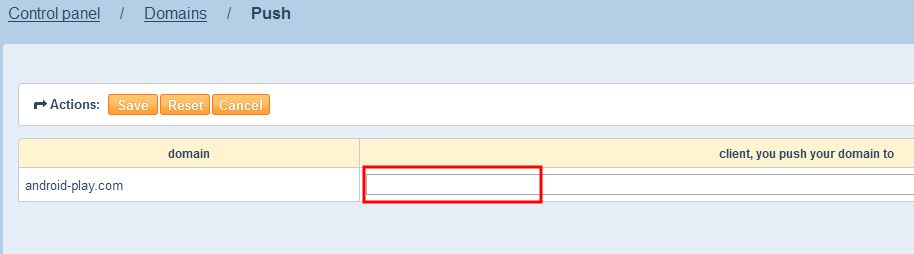
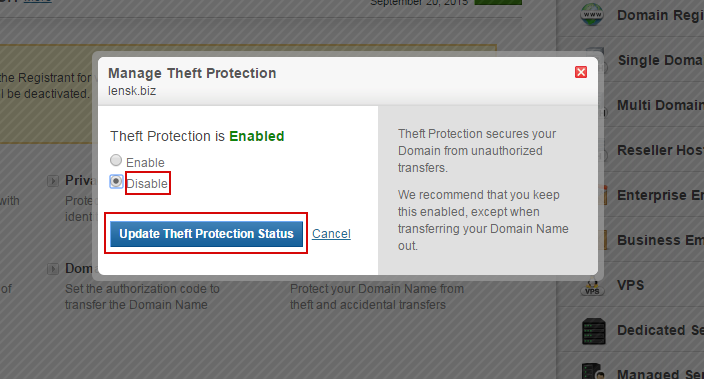
The process of transferring domains between users within one registrar is called Push. If you want to give your domain to other user, you need to unlock domain by clicking on the green checkmark in the "lock" column.
Next you should select one or several domains (1) and click on the "Push" button (2).
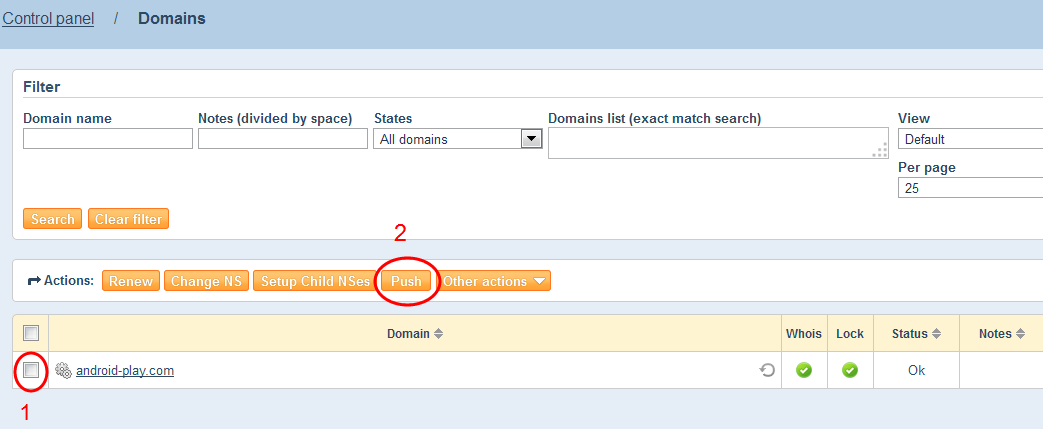
After that, write the login of new domain’s owner in the specific line.
- Transferring domain to other registrar
-
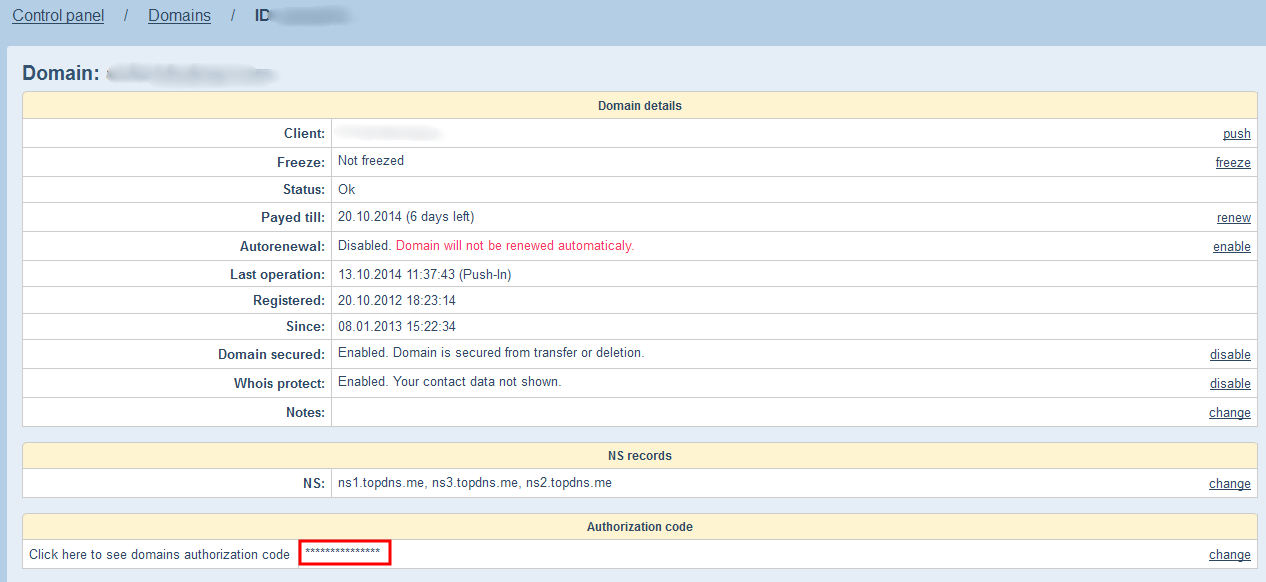
If you want to transfer domains to other registrars, the first thing you should do is to unlock domain by clicking on the green checkbox in the "Lock" column.

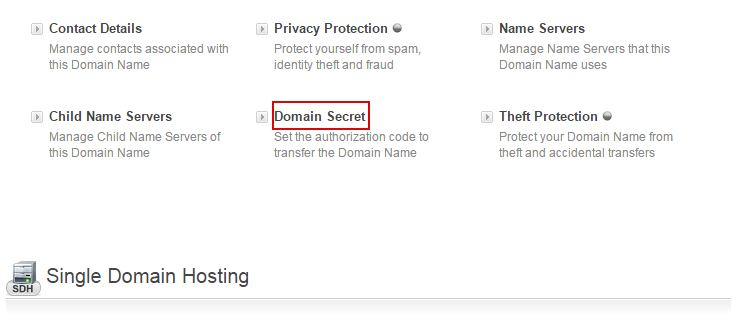
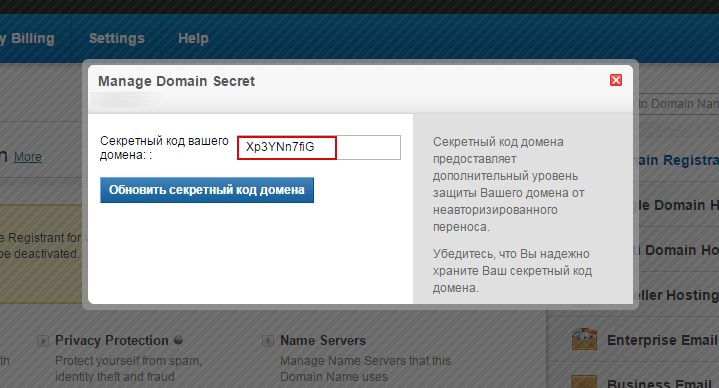
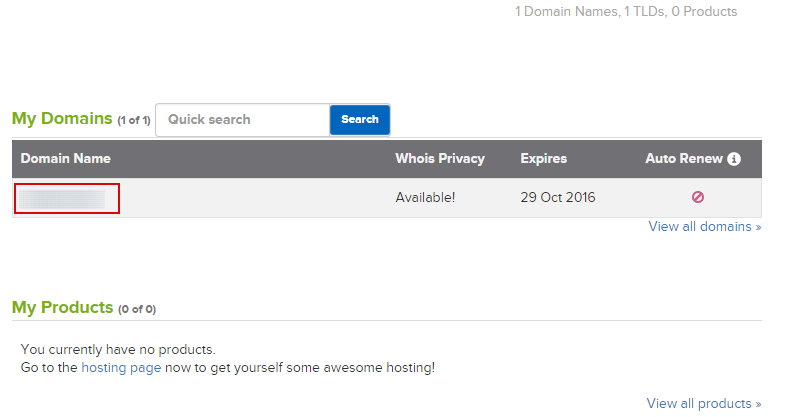
Next you need to receive the EPP code. To get the code, open domain control window by selecting the necessary domain in "My domains" section. After that you’ll receive the EPP code in the specific line.
- Transfering domains to ahnames.com
-
- From Directi
-
-
Log in to your account on Directi.com
-
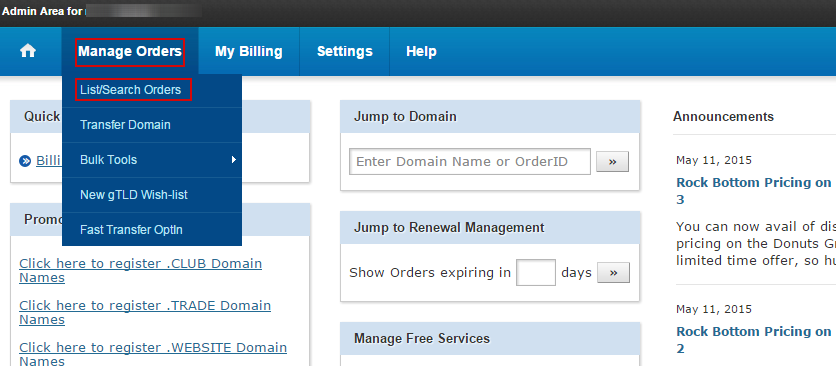
Go to "Order Management", then select "List of orders".
-
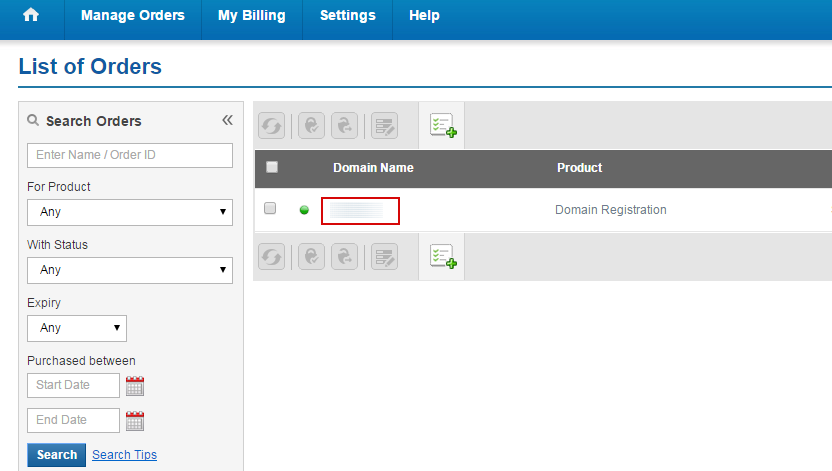
Click on the settings page for the required domain.
-
Disable domain protection so you can proceed with the transfer.
-
Open the "Code for domain transfer".
-
Copy the code and start the transfer procedure on our site.
-
Log into ahnames.com domain control panel.
-
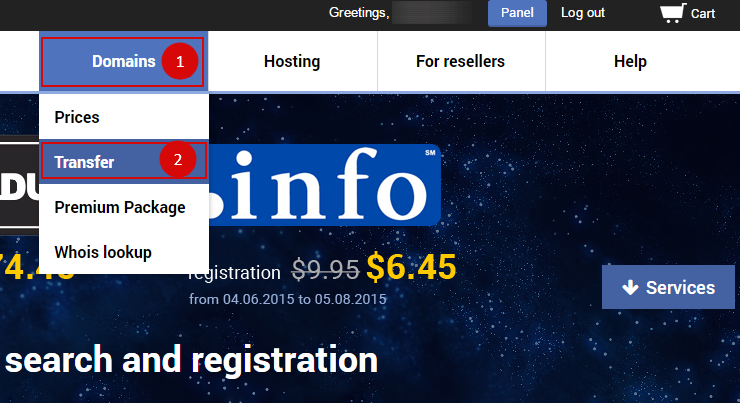
Go to "Transfer" section
-
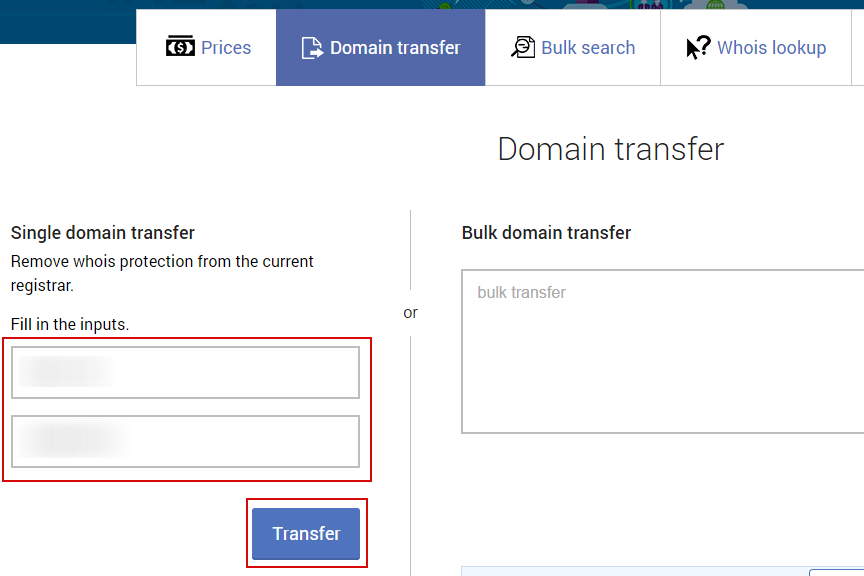
In the window that appears write the domain name and code or use the field for mass domain transfer (separating domain names with comma)
-
Click on "Proceed"

-
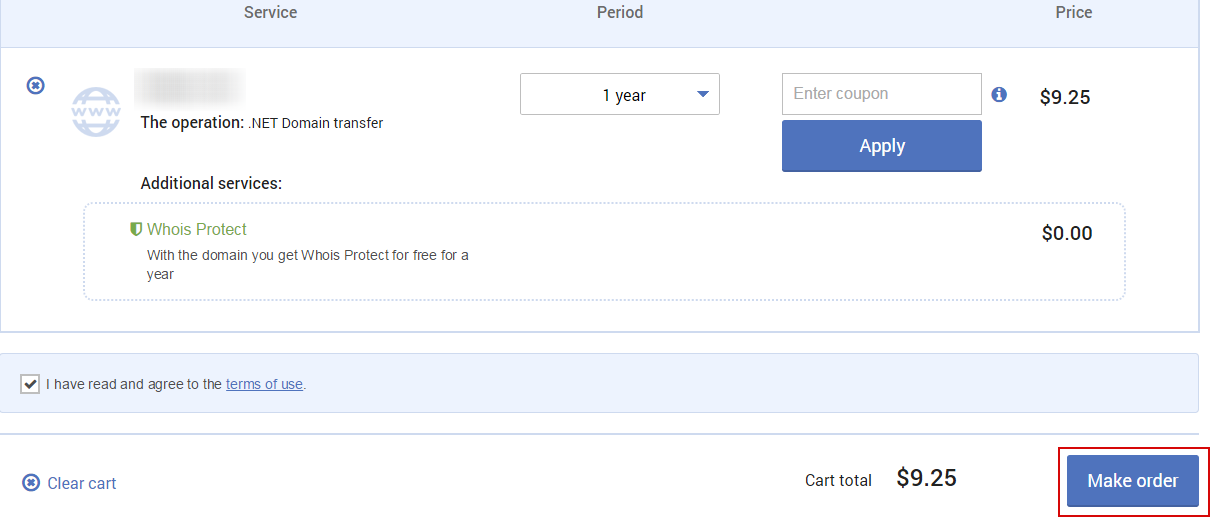
At checkout, click on "Pay" button to pay for domain transfer and other operations
-
Select the payment method

-
- From GoDaddy
-
-
Log in to your godaddy.com domain control panel

-
Click on "Manage" next to "Domains" section.
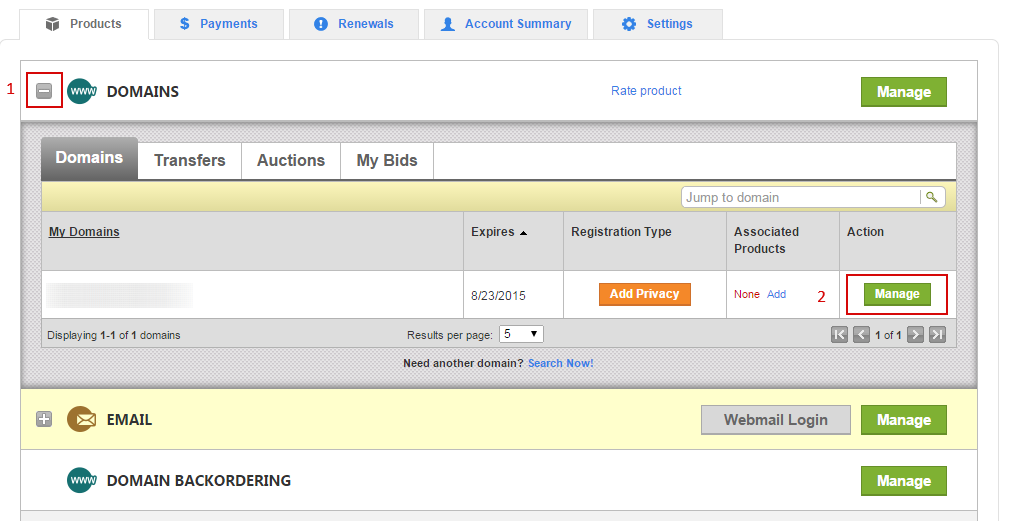
-
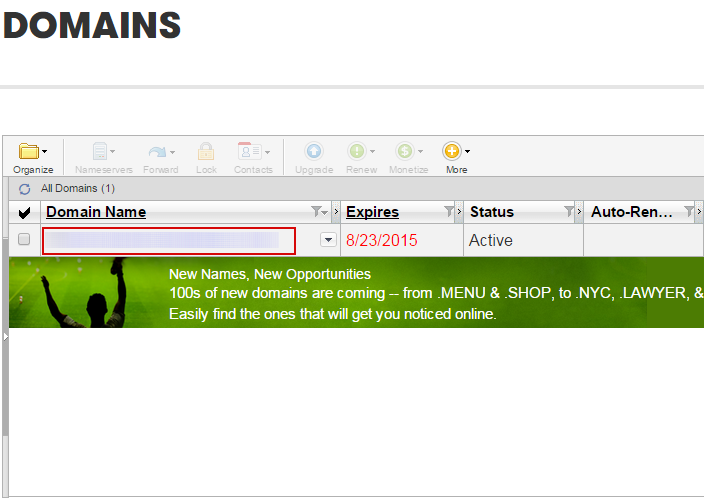
Click on the domain that you want to transfer.
-
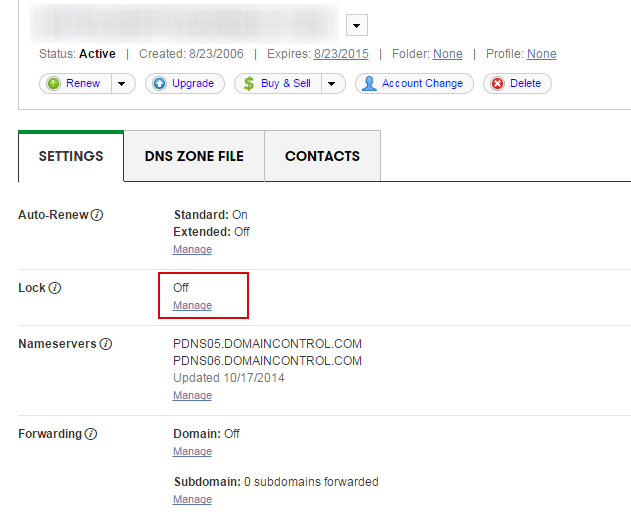
Click on "Manage" link in the "Lock" section (go to the next step if the status says "Locked: Off"). Uncheck the checkbox in the window that appears and click "OK".
-
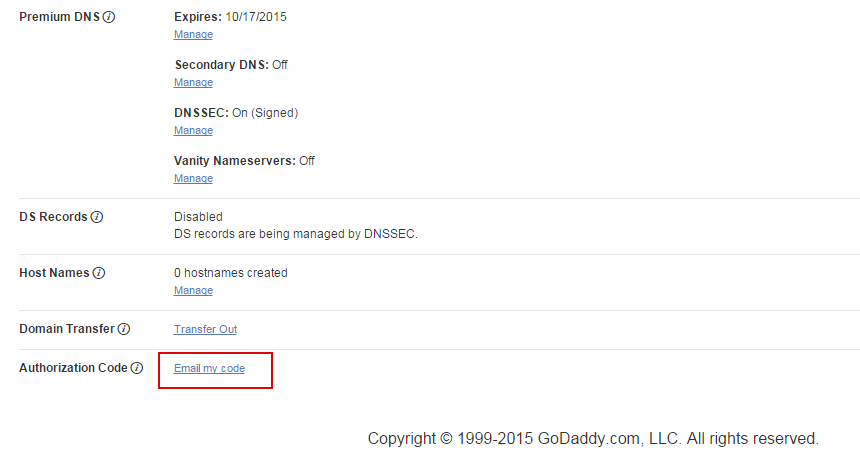
Click on "Email my code" in the "Authorization Code" section on the same page. The password for your domain will be sent to the email that was specified during domain registration.
-
Copy domain code (for its further activation in our control panel).
-
Log into ahnames.com domain control panel.
-
Go to "Transfer" section
-
In the window that appears write the domain name and code or use the field for mass domain transfer (separating domain names with comma)
-
Click on "Proceed"
-
At checkout, click on "Pay" button to pay for domain transfer and other operations
-
Select the payment method
-
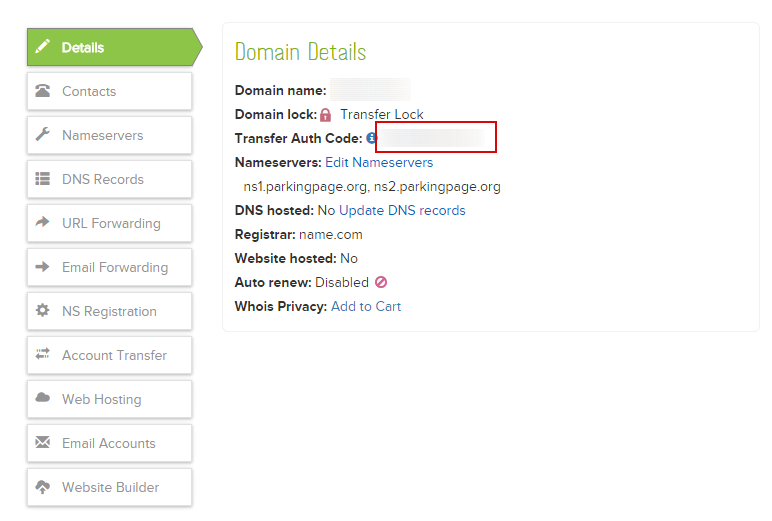
- From Name.com
-
-
Log in to your account on name.com.
-
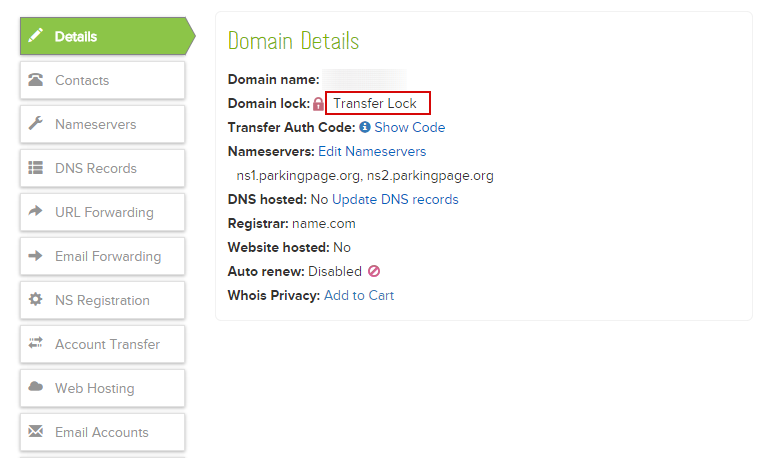
Click on the settings page for the required domain
-
If the domain is blocked for transfer, click «Transfer Lock»
-
Click on «Show Code»

-
Copy the code and start the transfer procedure on our site
-
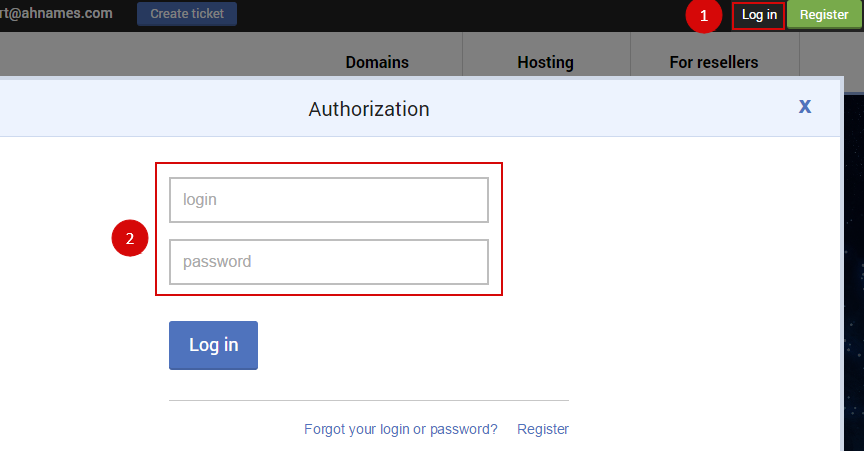
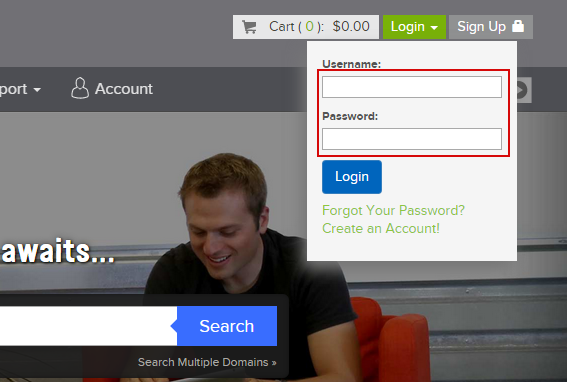
Log into ahnames.com domain control panel.
-
Go to "Transfer" section
-
In the window that appears write the domain name and code or use the field for mass domain transfer (separating domain names with comma)
-
Click on "Proceed"
-
At checkout, click on "Pay" button to pay for domain transfer and other operations
-
Select the payment method
-
- From Name Cheap
-
-
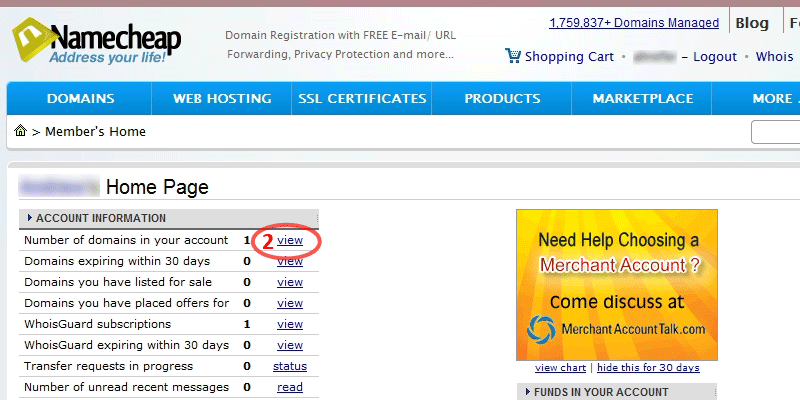
Login to your control panel domain https://namecheap.com/
-
In Control Panel, click on the link «Number of domains in your account».
-
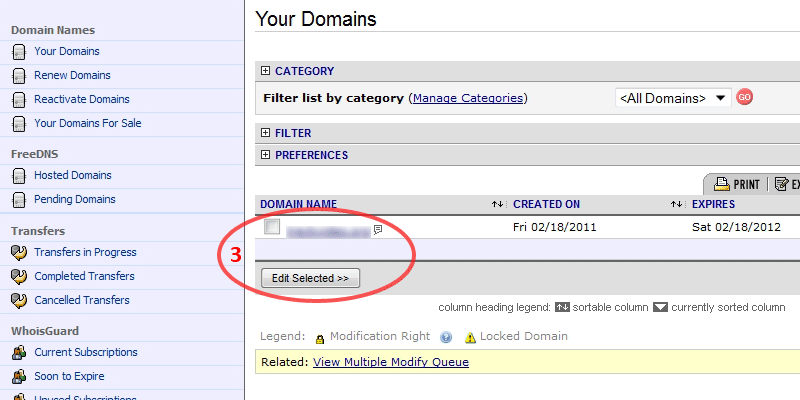
Next to the domain that you want to transfer, check, and click «Edit selected».
-
Next, click «Registrar Lock» for permission to transfer the domain.
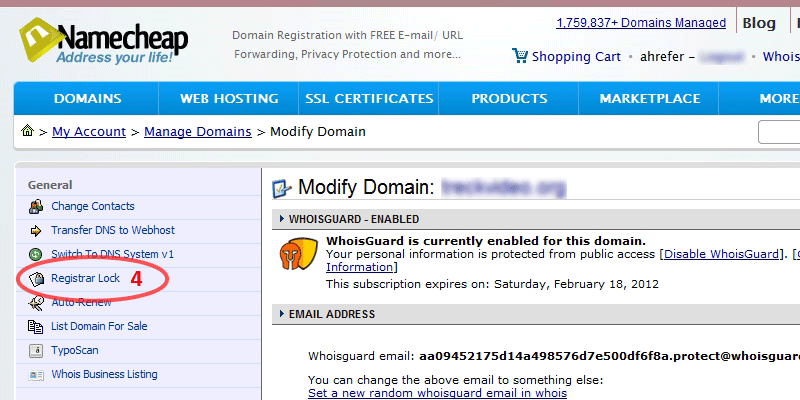
-
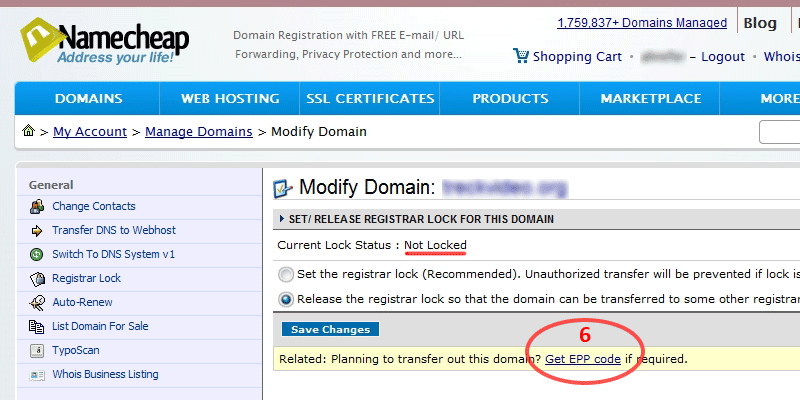
Check the status of the domain. If the Current Lock Status is Locked, put a tick in front of: «Release the registrar lock so that the domain can be transferred to some other registrar» and click «Save changes».

-
If the status of «" Current Lock: Status "Not Locked"», click below on «Get EPP Code».
-
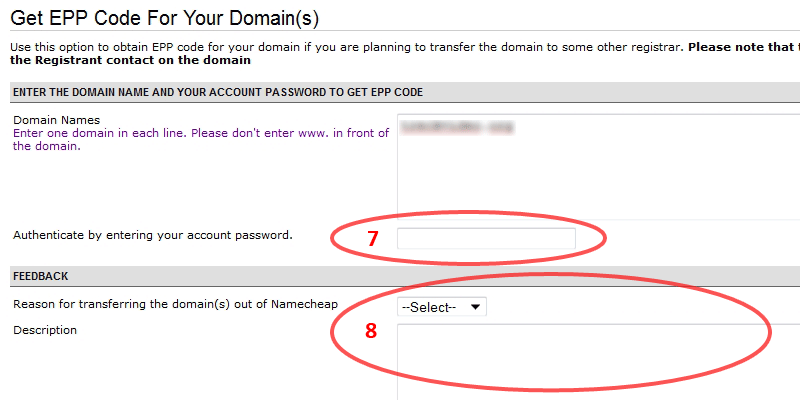
In the «Authenticate by entering your account password» enter your password to access the panel Namecheap.com.
-
If you want, fill out a feedback form and indicate the reason for transfer (optional).
-
Log into ahnames.com domain control panel.
-
Go to "Transfer" section
-
In the window that appears write the domain name and code or use the field for mass domain transfer (separating domain names with comma)
-
Click on "Proceed"
-
At checkout, click on "Pay" button to pay for domain transfer and other operations
-
Select the payment method
-
- From Domain.com
-
-
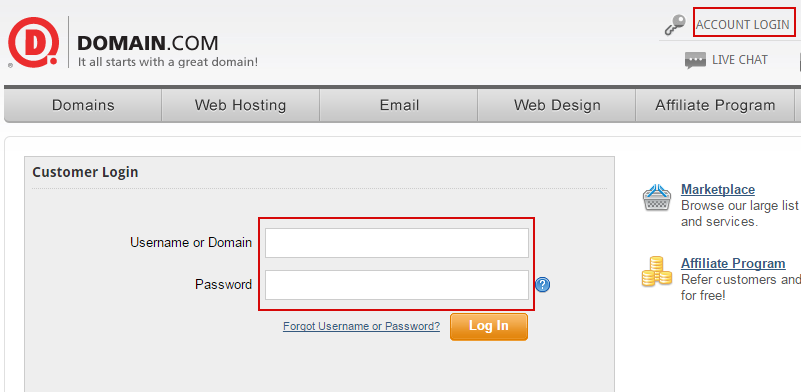
Log in to your account on Domain.com
-
In the "Domain" section, open the tab "Domain Central"
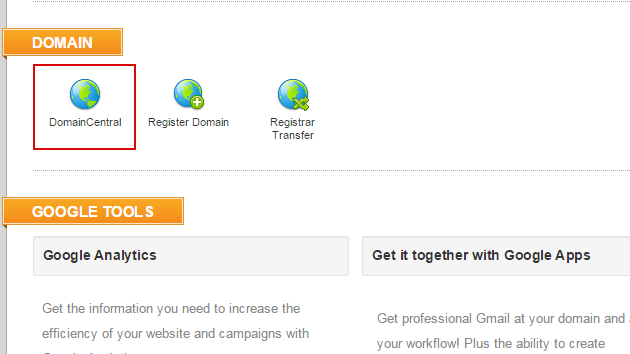
-
Go to domain settings
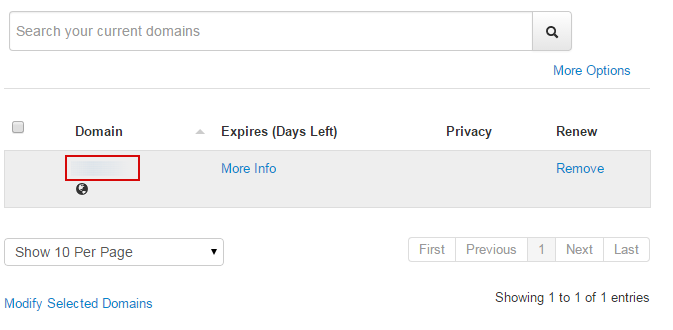
-
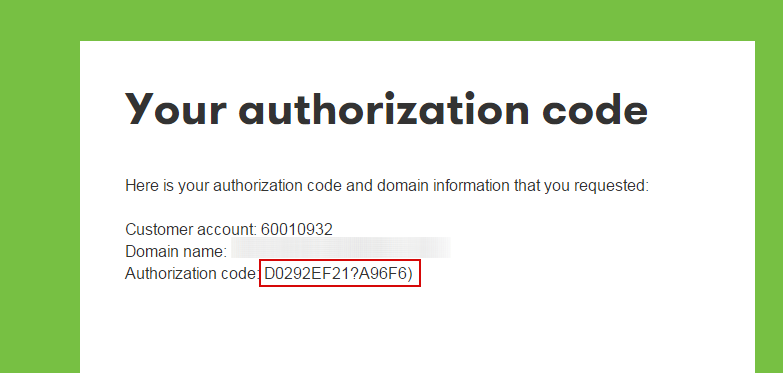
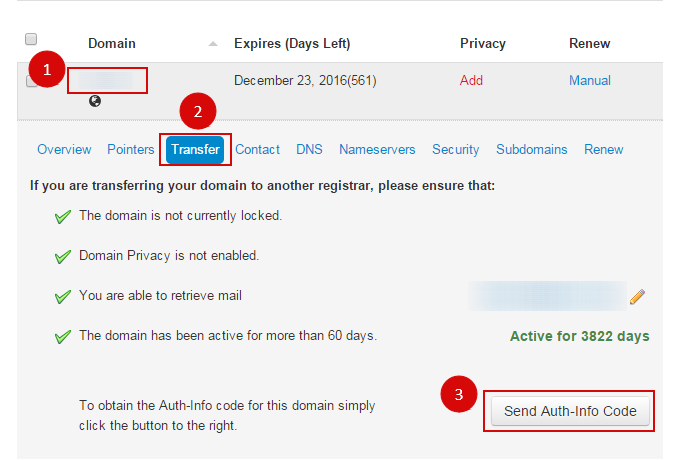
Open the "Transfer" tab, then click "Send Auth-Info code"
-
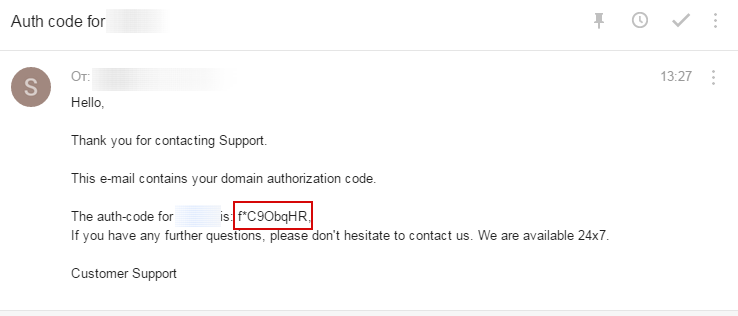
Copy the code and start the transfer procedure on our site
-
Log into ahnames.com domain control panel.
-
Go to "Transfer" section
-
In the window that appears write the domain name and code or use the field for mass domain transfer (separating domain names with comma)
-
Click on "Proceed"
-
At checkout, click on "Pay" button to pay for domain transfer and other operations
-
Select the payment method
-
- From InternetBS
-
-
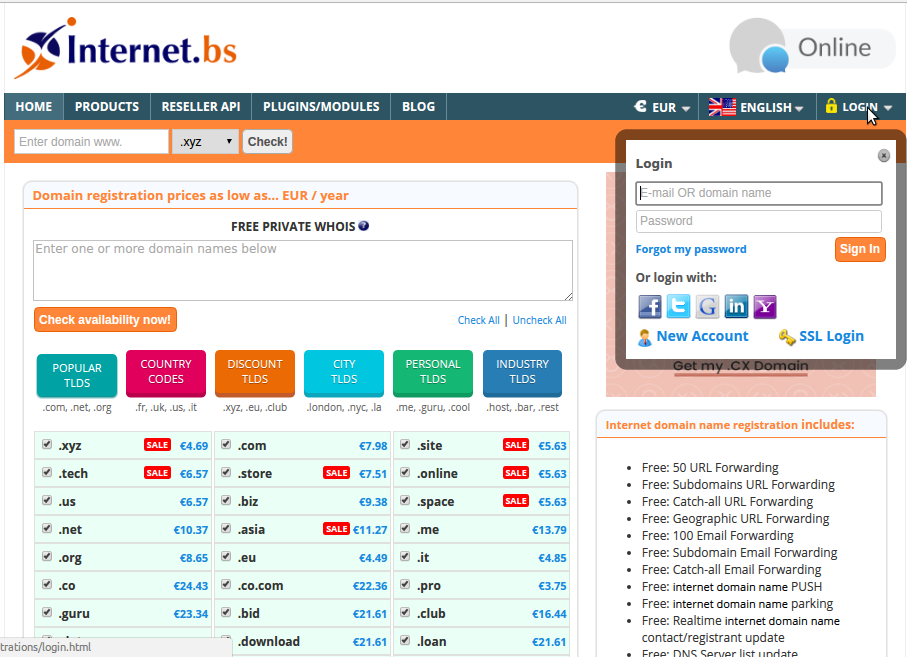
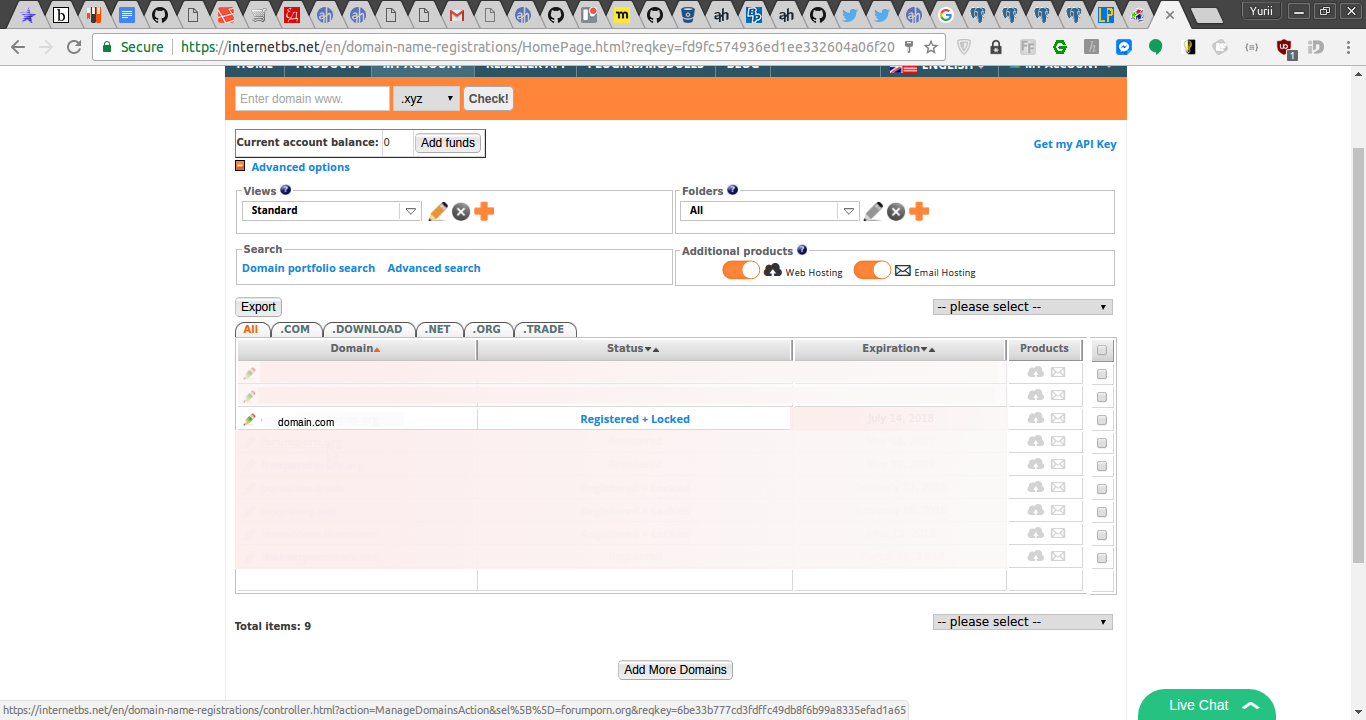
Log in to your InternetBS domain control panel
-
Click on the domain that you want to transfer.
-
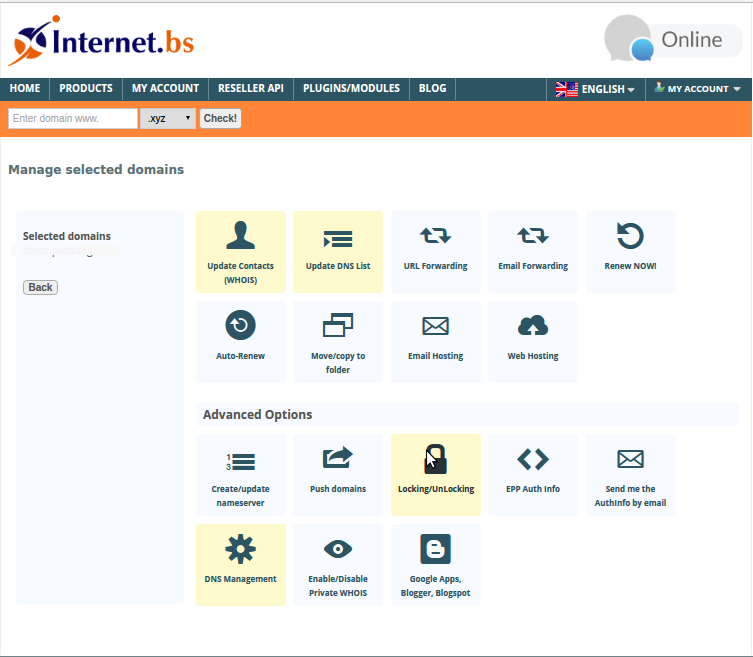
Click on Locking/Unlocing. Disable Lock
-
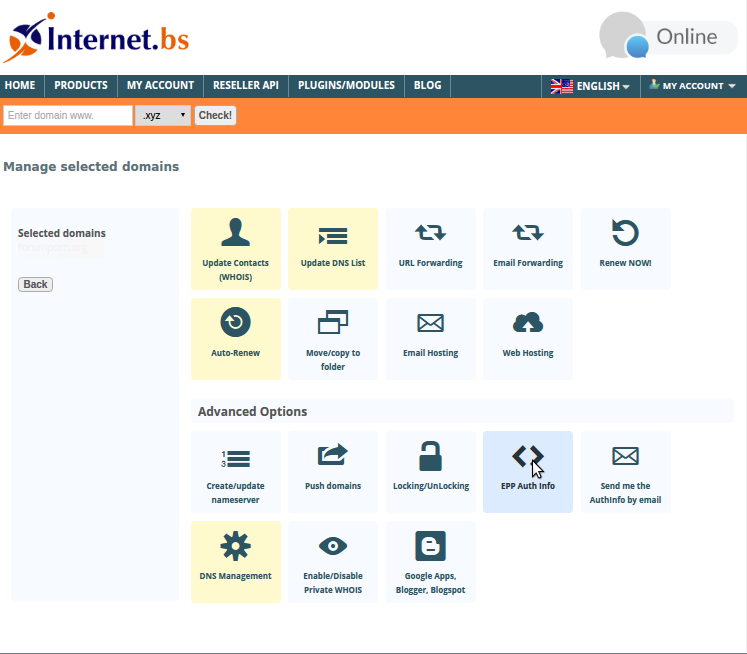
Get Auth-code: click on EPP Auth Info
-
Log into ahnames.com domain control panel.
-
Go to "Transfer" section
-
In the window that appears write the domain name and code or use the field for mass domain transfer (separating domain names with comma)
-
Click on "Proceed"
-
At checkout, click on "Pay" button to pay for domain transfer and other operations
-
Select the payment method
-
-
- What is an official registrar identifier of ahnames.com?
-
com.ua, kiev.ua - full company name DANESCO TRADING LTD., identifier ua.danesco
- gTLD domains - full company name DANESCO TRADING LTD., identifier IANA 1418
- Errors and problems
-
- I didn’t receive the transfer authorization letter (FOA)
-
Check to what address the transfer authorization letter was sent. To do so, open domain control window and select the necessary domain from "My domains" tab. The address to which the transfer authorization letter was sent will be shown in the "Status" field. If you see contact@privacyprotect.org or similar address instead of your email, this means that you have not deactivated the Whois Protect service offered by your current registrar. Deactivate the Whois Protect and wait for 10-15 minutes. Then click on "send FOA again" link
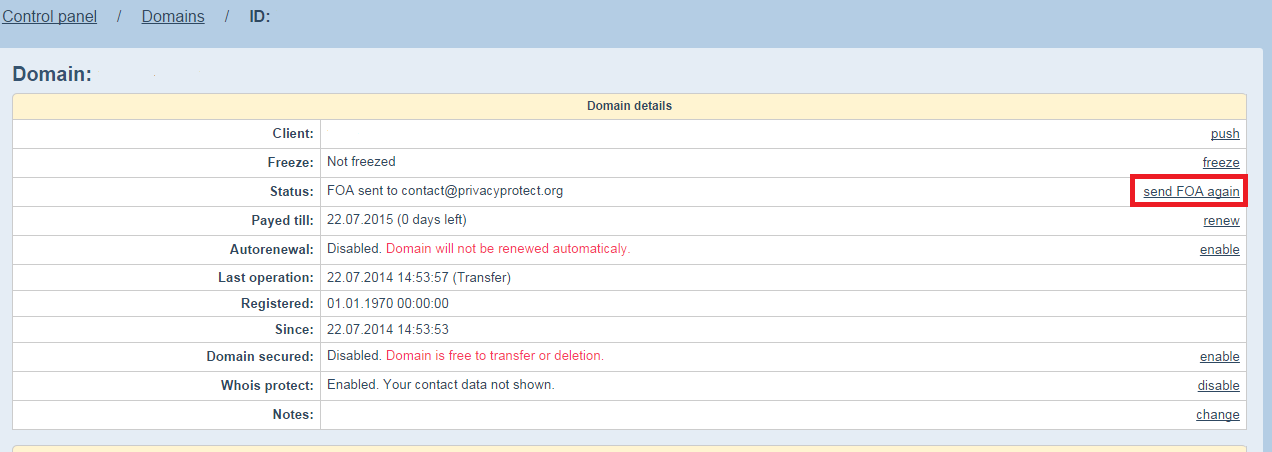
If the status shows your email address, check your spam folder or wait for 5-7 minutes.
- Invalid authorization information Error
-
This error means that the wrong EPP domain code was provided. Copy the EPP code again. If the error repeats, write us a ticket for manual transfer indicating domain name and EPP code.
- Transfer is prohibited for the domain error
-
This error means that you didn’t unlock your domain from current registrar. Depending on the registrar, this option may be called differently. If you have trouble finding it, contact the tech support of your current registrar or read the transfer FAQ if your registrar is one of the following: